Why did i make this site like this exactly..
I wanted to make something simple and specific towards my project, making it on a cube and each side having another project presented on it since each project was completely different hence it being on the sides of the cube, but at the same time they are connected
Movie Website documentation
1. In the Homework section of your IM website provide documentation of your project. Documentation should include:
Project Description: what is the project, what is the overal concept and theme, and what kind of experience you were striving to create.
Process: How did you go about implementing the concept.
Reflection/Evaluation: This should bookend the intial concept and talk about whether your expectations and goals were met in the process of building the final working version.
-- This project that is linked to the 30MFF is a website created in order to advertise a movie. I created it in a way where it is very accesable and easy to use, with clear links and descriptions. In order to add interactivity I included a countdown that is according to the "release date" using javascript, and I also included a gallery where the user can scroll through photos.
-- There was a part where I was not able to quite figure out, and that was that I wanted to include a magnifying feature on the map in the "About" section, but the codes where confusing.
-- Choosing the color scheme was based on the color scheme of the video, and I stuck with that color scheme all throughout the website.
-- I included four tabs at the top, one that redirects you to the home page, then one for more description about the movie, one takes you to the "showtimes", and the last tab takes you to a page with four links to social media platforms.
Comic Project documentation
Getting the idea
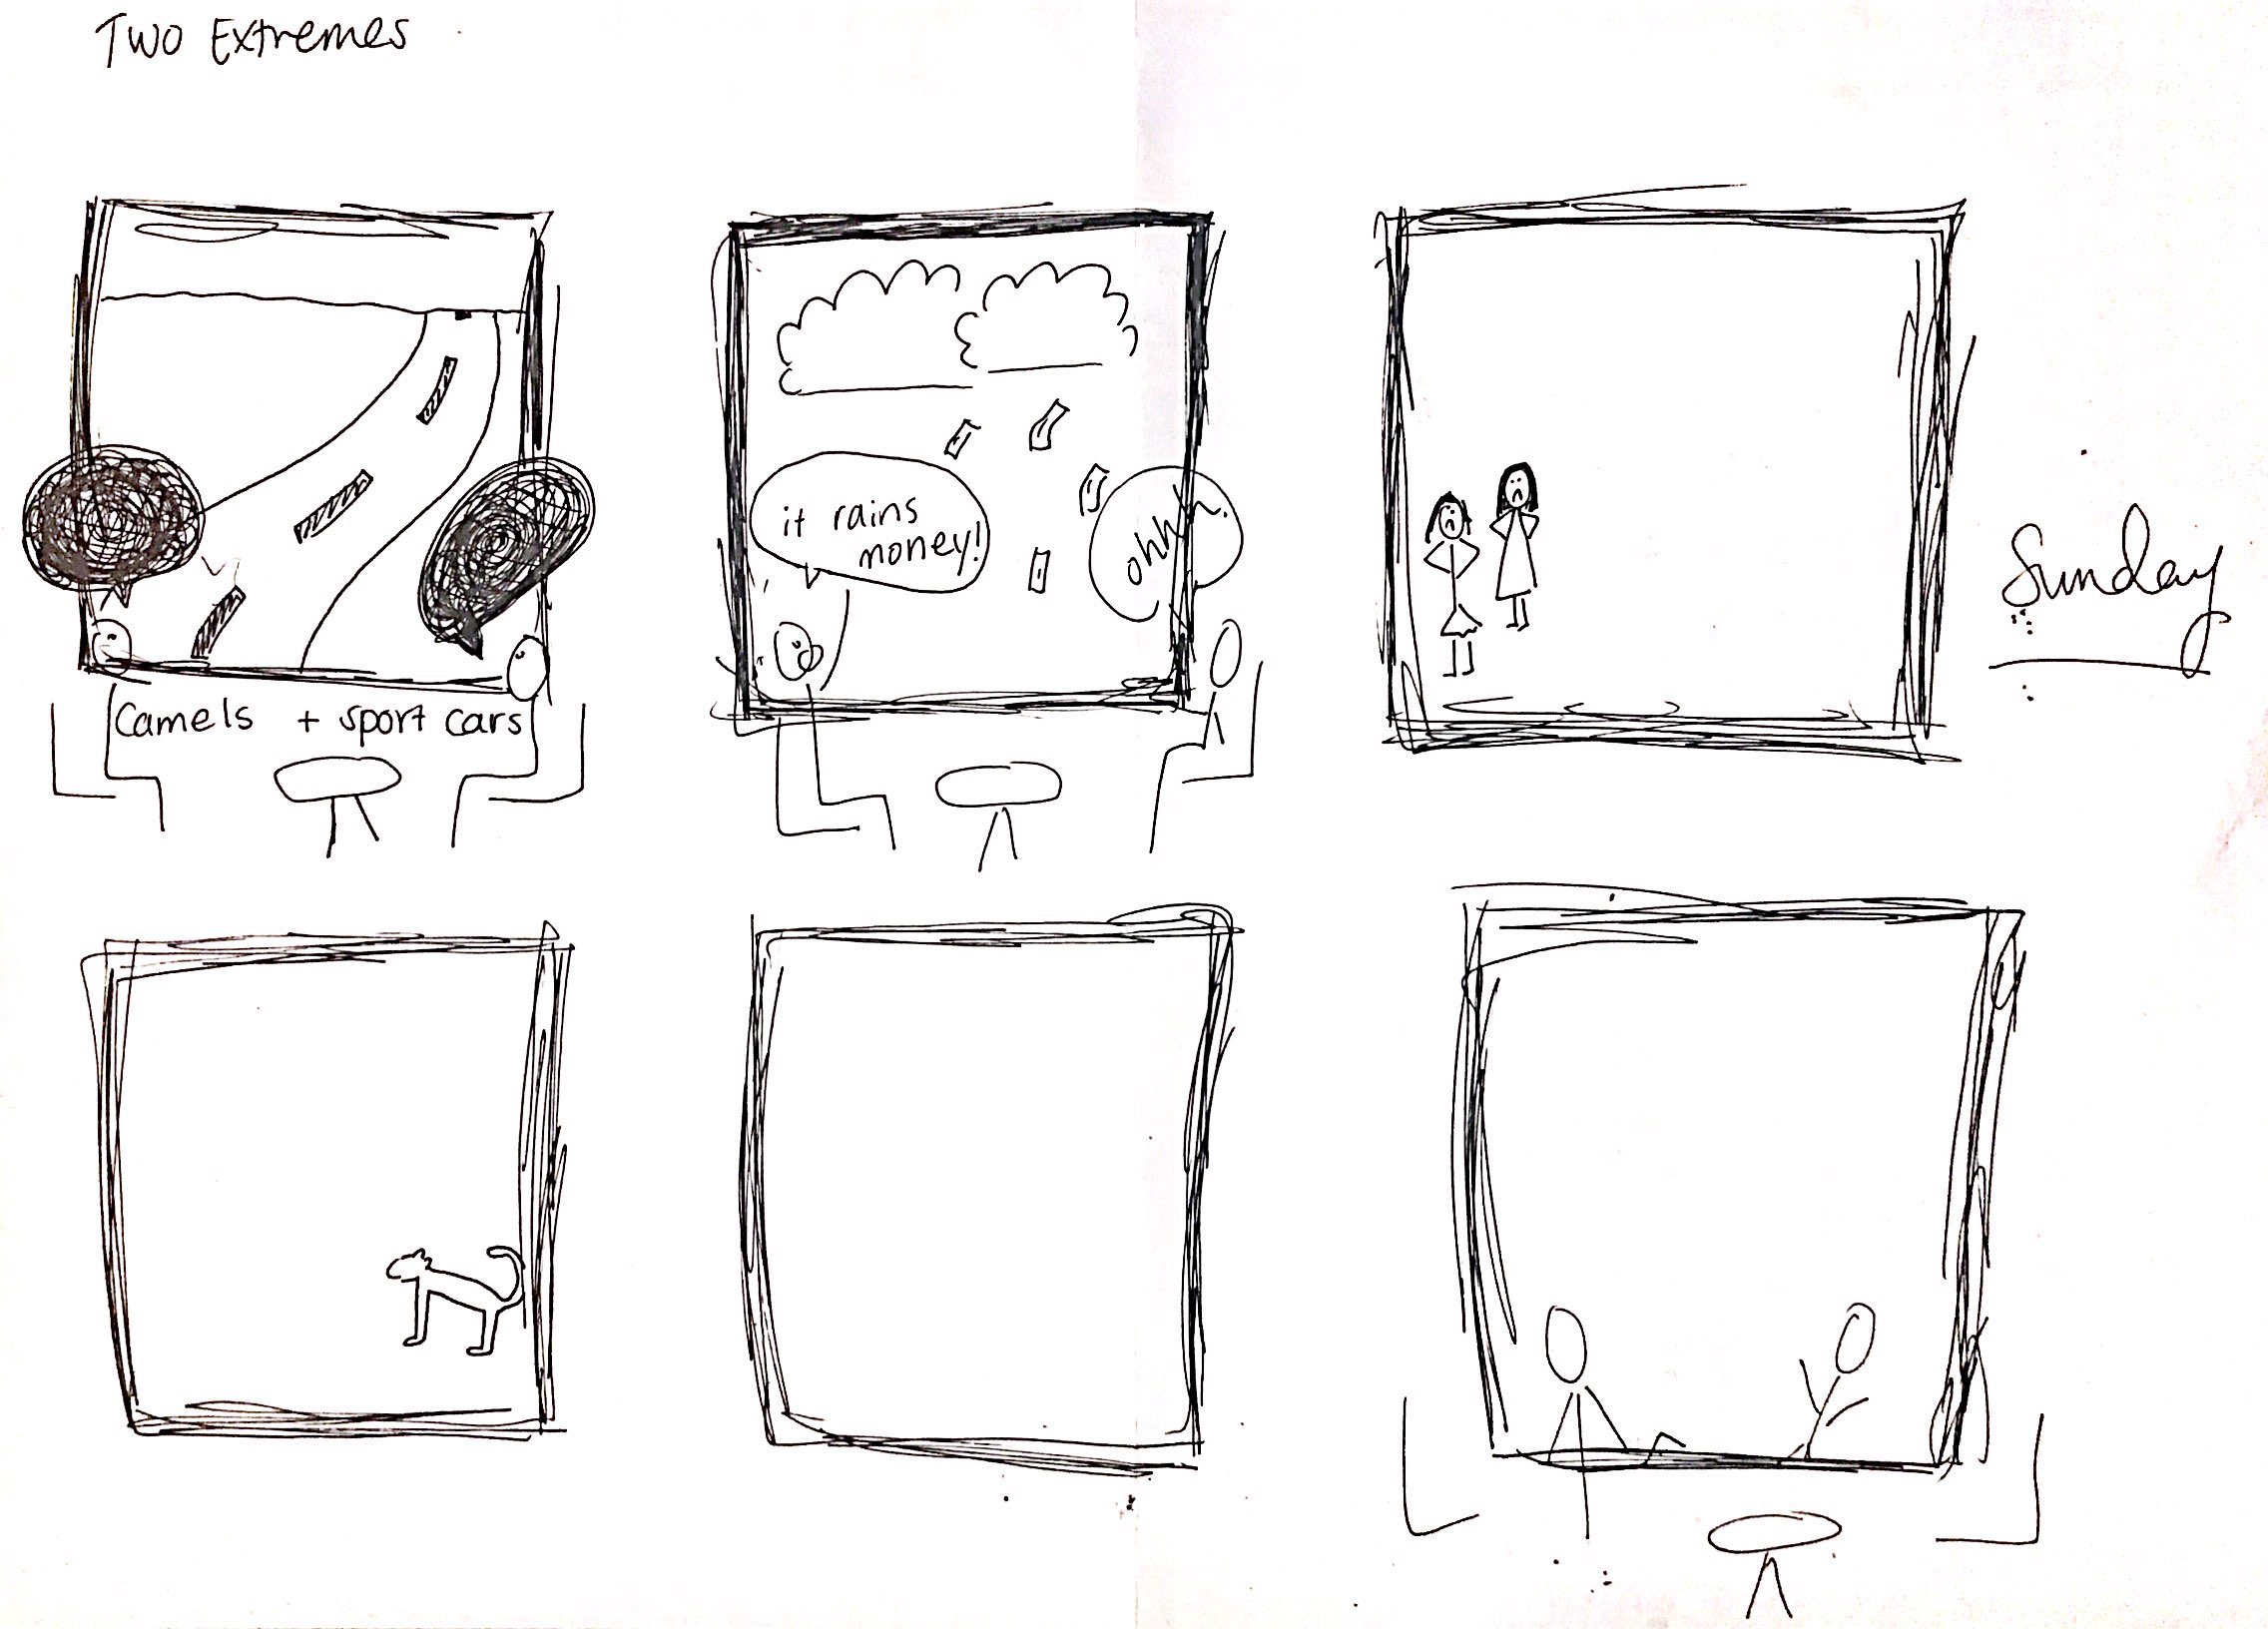
When brainstorming ideas for our project we wanted it to have a light comical feeling to it and somehow tie it back to something we relate to. then we started talking about the stereotypes we hear about the UAE, and i shared what ive heard. and some things were quite baffling. And we all came down to this final idea of creating a comic about these stereotypes but adding an extreme aspect to it.
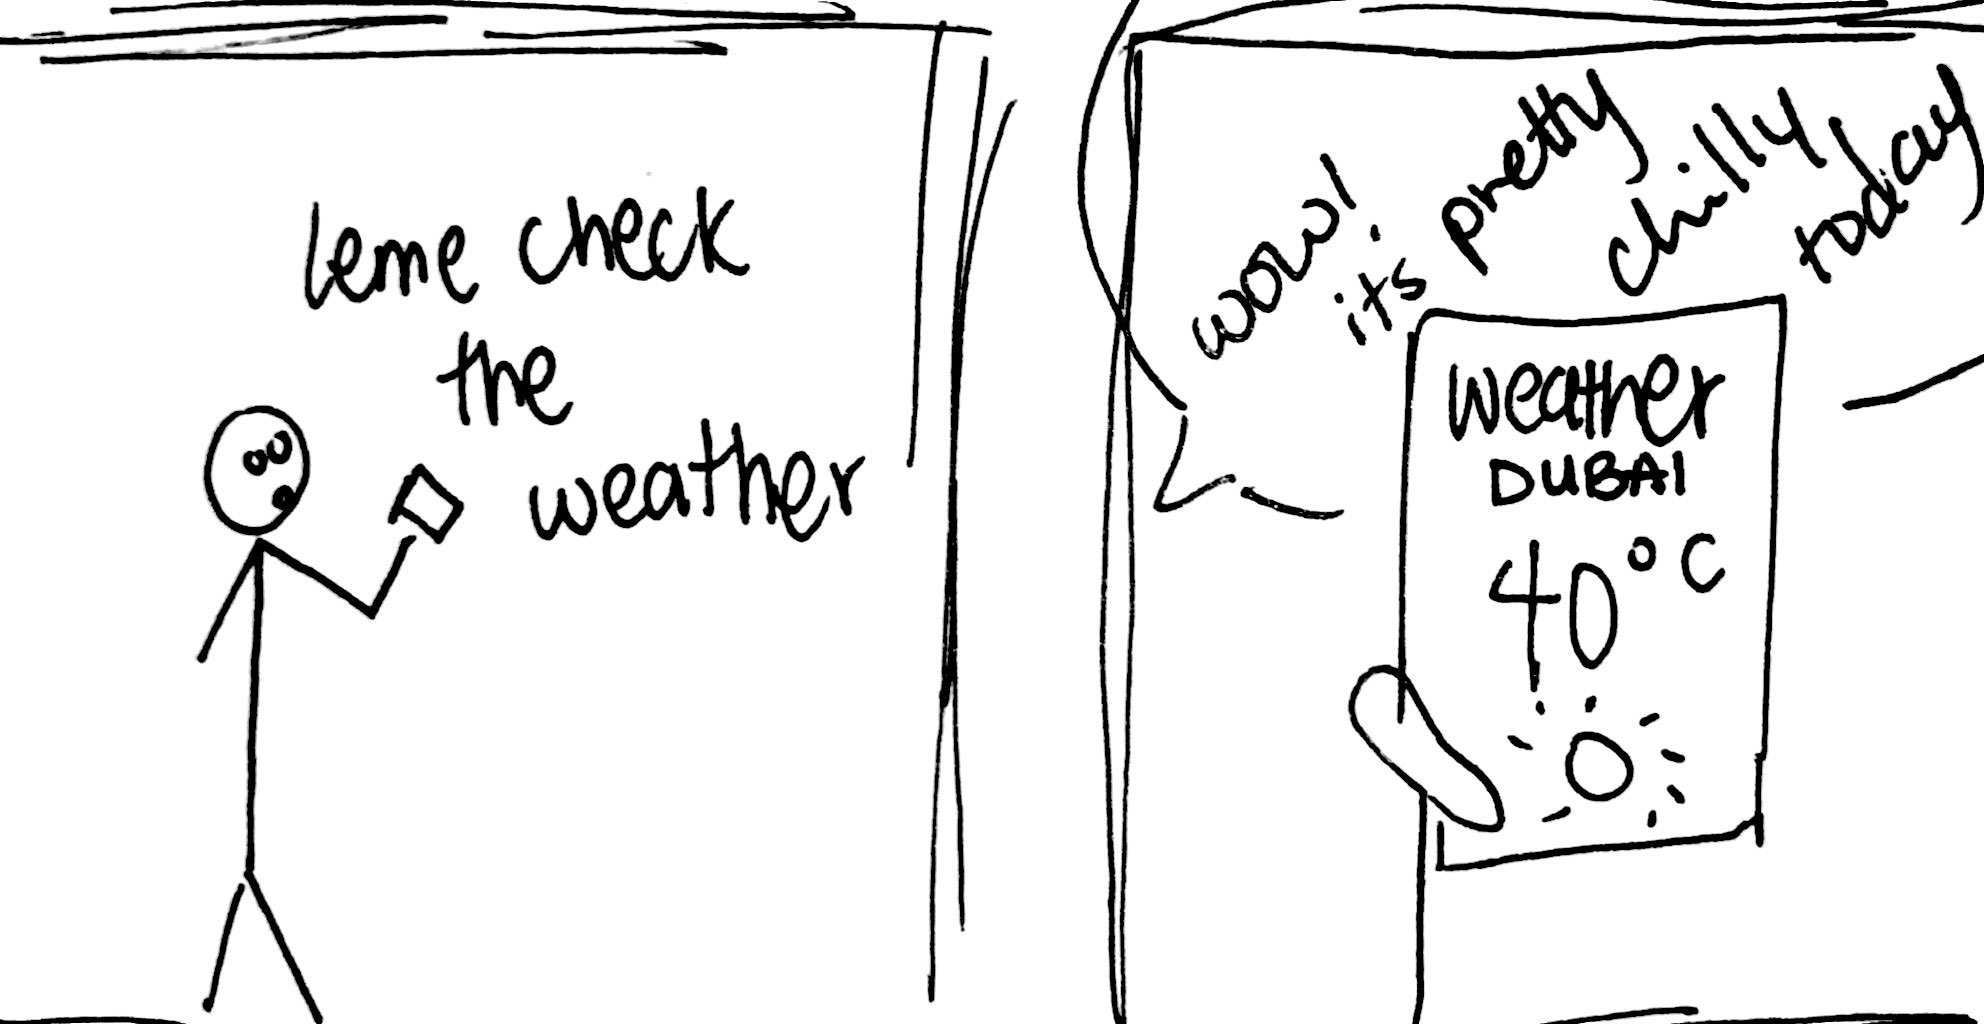
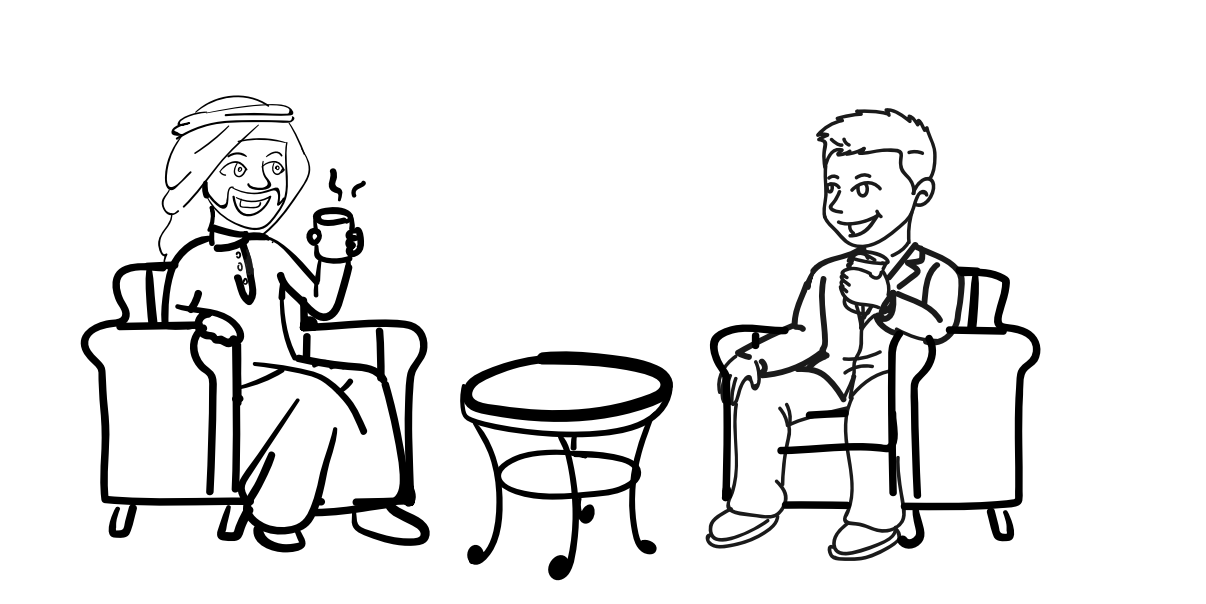
Then we thought about how to present such an idea. A conversation between a local to the country and a foriegner curious seemed to be the best idea. I liked the idea of having them be seated as if theyre in a coffee shop, where the normal window of the cafe changes into pannels depending on the topic they are discussing. And in the last pannel the idea of having them defy the laws and enter that pannel to see how the UAE truly is.
Drawing
When creating the illustrations, we decided on using the Microsoft Surface Studio computers for accessability it provides and the ease in using the programs illustrator and photoshop. Illustrator was quite difficult to use at first, for example sometimes the lines would not go the way you want them to. I prefered using photoshop in the end, and ended up sticking to that program for most of the drawings.
What I found to work greatly was since I was drawing the two figures in the front, originally I had several layers while drawing. But after youre done, you combine all the layers to one. Because our final images all have two layers, the two men and the pannel in the back. So it keeps your documents clean and organized.
since we decided on having 6 pannels, i first started off with drawing the figures in 6 different positions, then we decided on a color scheme.
Website
When talking about our website layout and how we want to present our comic, we agreed upon something with a pop of color, with a fun font. and for the user to enter and start reading they will press the big button in the middle of the screen taking them to the comic. then they are presented with a scroller at the bottom that takes you through the pannels, buttons on the side were also included.
An about page gave a breif background about the comic, talking about the group members, their experience and where the idea was derived from.

Interactivity
- In the comic:
The characters in the end interact with their background and "enter" a magical window that leads them to the UAE.
- In the website:
Main page with a button directing the user to "enter" the comic.
Photo gallery presenting the comic, with buttons on the side to easily scroll and procceed.
About button
Overall Expectations
I really enjoyed making this project, I became more knowledagble about using illustrator and photoshop. and the overall design of the entire thing seemed to fit nicely.
Audio Project
The idea
Since our project revolved around audio, we wanted to think about places where audio is amplified due to awkwardness or nervousness. So the idea of "Why you shouldnt go to the movies on the first date" came up
The recording
When recording for the project we decided and wrote the script arouund three actors. For the male part, a student volunteered and we practiced the script then placed the zoom recorder between the two main actors and recorded each scene as a clip. We also included popcorn for parts when the actors wouuld be eating and talking for a more realistic sound clip.
Editing
n For other sounds that we could not recreate easily we found a site that contained a variety of free sounds https://freesound.org, sounds to create a movie theatre ambiance or a car ride. Placing the combination of our recording audio and sample from online in Audacity, there is where we combined all the sounds together.
When doing so, we noticed that some of the dialoge did not quite fit and we managed to rerecord some parts, for example the movie theatre scene we rerecorded the male actor whispering where he was talking loudly for Audacity could only lower the volume but the feeling of whispering would not be there.
Useful resources
https://freesound.org
https://css-tricks.com/creating-css-sliding-door-effect/
Website
When creating the website, we wanted the first page to be a curtain symbolizing a theatre with the title with a button to start "the date". And the pages where the audio files are present, we made it very simple. A background that gave the user some sort of image in their head while listening but not too much where it would distract the user from focusing on the sounds. The background was the setting where each audio took place, and it worked as an aid to the user.
A hover effect was placed over the images, so when the mouse would be over it you would see the audio player, title, and a button to go next. But when the mouse wasnt hovering on the page, you would only see the image, thus giving the user less distraction from the photo.
Video Project
The idea
We all agreed that our project will fall in the third category which was the "3 steps", but deciding on what those three steps will follow took a while to settle on a final idea. In the begininng Omar and Wahib presented me with the idea of "The One True Religion", a rough script and idea was made as well. But then we all agreed that it was a bit dark, and we were more interested in making a light and funny video that we would enjoy filming. I brought up the green screen when we were brainstorming, and I liked how our project could literarly be about anything with the help of a green screen we were no longer confined to what we have access to in location but we could go anywhere instead. And i sugessted how about we create it about something that sounds crazy, like how to reach the moon in 3 steps. and that was the idea that stuck, and with the help of Omar he brought in how it could be a twist to conspiracy theories. With that thought in mind, it also set a vague idea on how the website format will be since it is a youtuber.

Team
Regarding how the teamwork was divided, we decided on three categories; the actor, web design, and video editing. And we also shared a google doc, where Wahib wrote a draft of the script and shared it with us to edit or add any parts we thought nessesary. And we also shared a facebook group for immediate response and feedback from each other. I felt like the communication was really good and each of us was able to input their own idea to form our final project.
Location & costume & Filming
When discussing the idea, obviously the argument of what the actor should wear came up, we did not know if the costume had anything astronaut like and we also looked online at party stores and souq.com. We decided we should check out what the art department has before deciding if we should buy or borrow one.
We booked the green screen room for wednesday of last week, but before heading there Omar and Wahib managed to go to the costume shop and figure out what our actor could wear for his trip to space. After being walked through on how to use the green screen room we set out for filming our scene that took place on the moon. Since it was our first shot, it took a while to adjust the camera especially it being in a dark room it took us some time. And after several cuts we finally managed to get a good video all in one. We noticed a room beside the green screen one, i think its called the set room and it had been organized as if it was a bedroom with a white board and desk and all. We were drawn to that room and filming in it wouldve been nice, but to book that room we found out later on we would have to wait 4 to 5 days. and we really wanted to finish our filming as soon as possible. so then i suggested we film in my room, since i have tapestries and wall art it would add character to our youtuber. so the next day, during class time we met in my room and started filming the rest of the clips we needed.
Editing
We mainly left the editing to Omar since he wanted to work on something other than coding due to his coding-heavy work from other courses. But before he began editing we discussed as a group how we envisioned our project to be. We agreed on adding transitions between clips to avoid it from not flowing nicely and an intro like youtubers would seem only appropriate. After our panic attack of thinking all our footage was erased and then finding out hours later that it was all on the other SD card, Omar started editing using the softwares Adobe Premiere and AfterEffects. He would share with us his progress and Wahib and I would give him feedback on certain things. I was kind of worried about the green screen part, since the costume we DIY-ed in the end was a bit reflective and it might reflect the green screen in the back causing an issue in post production but when Omar showed us the final results i was really glad that it worked out perfectly.
Website
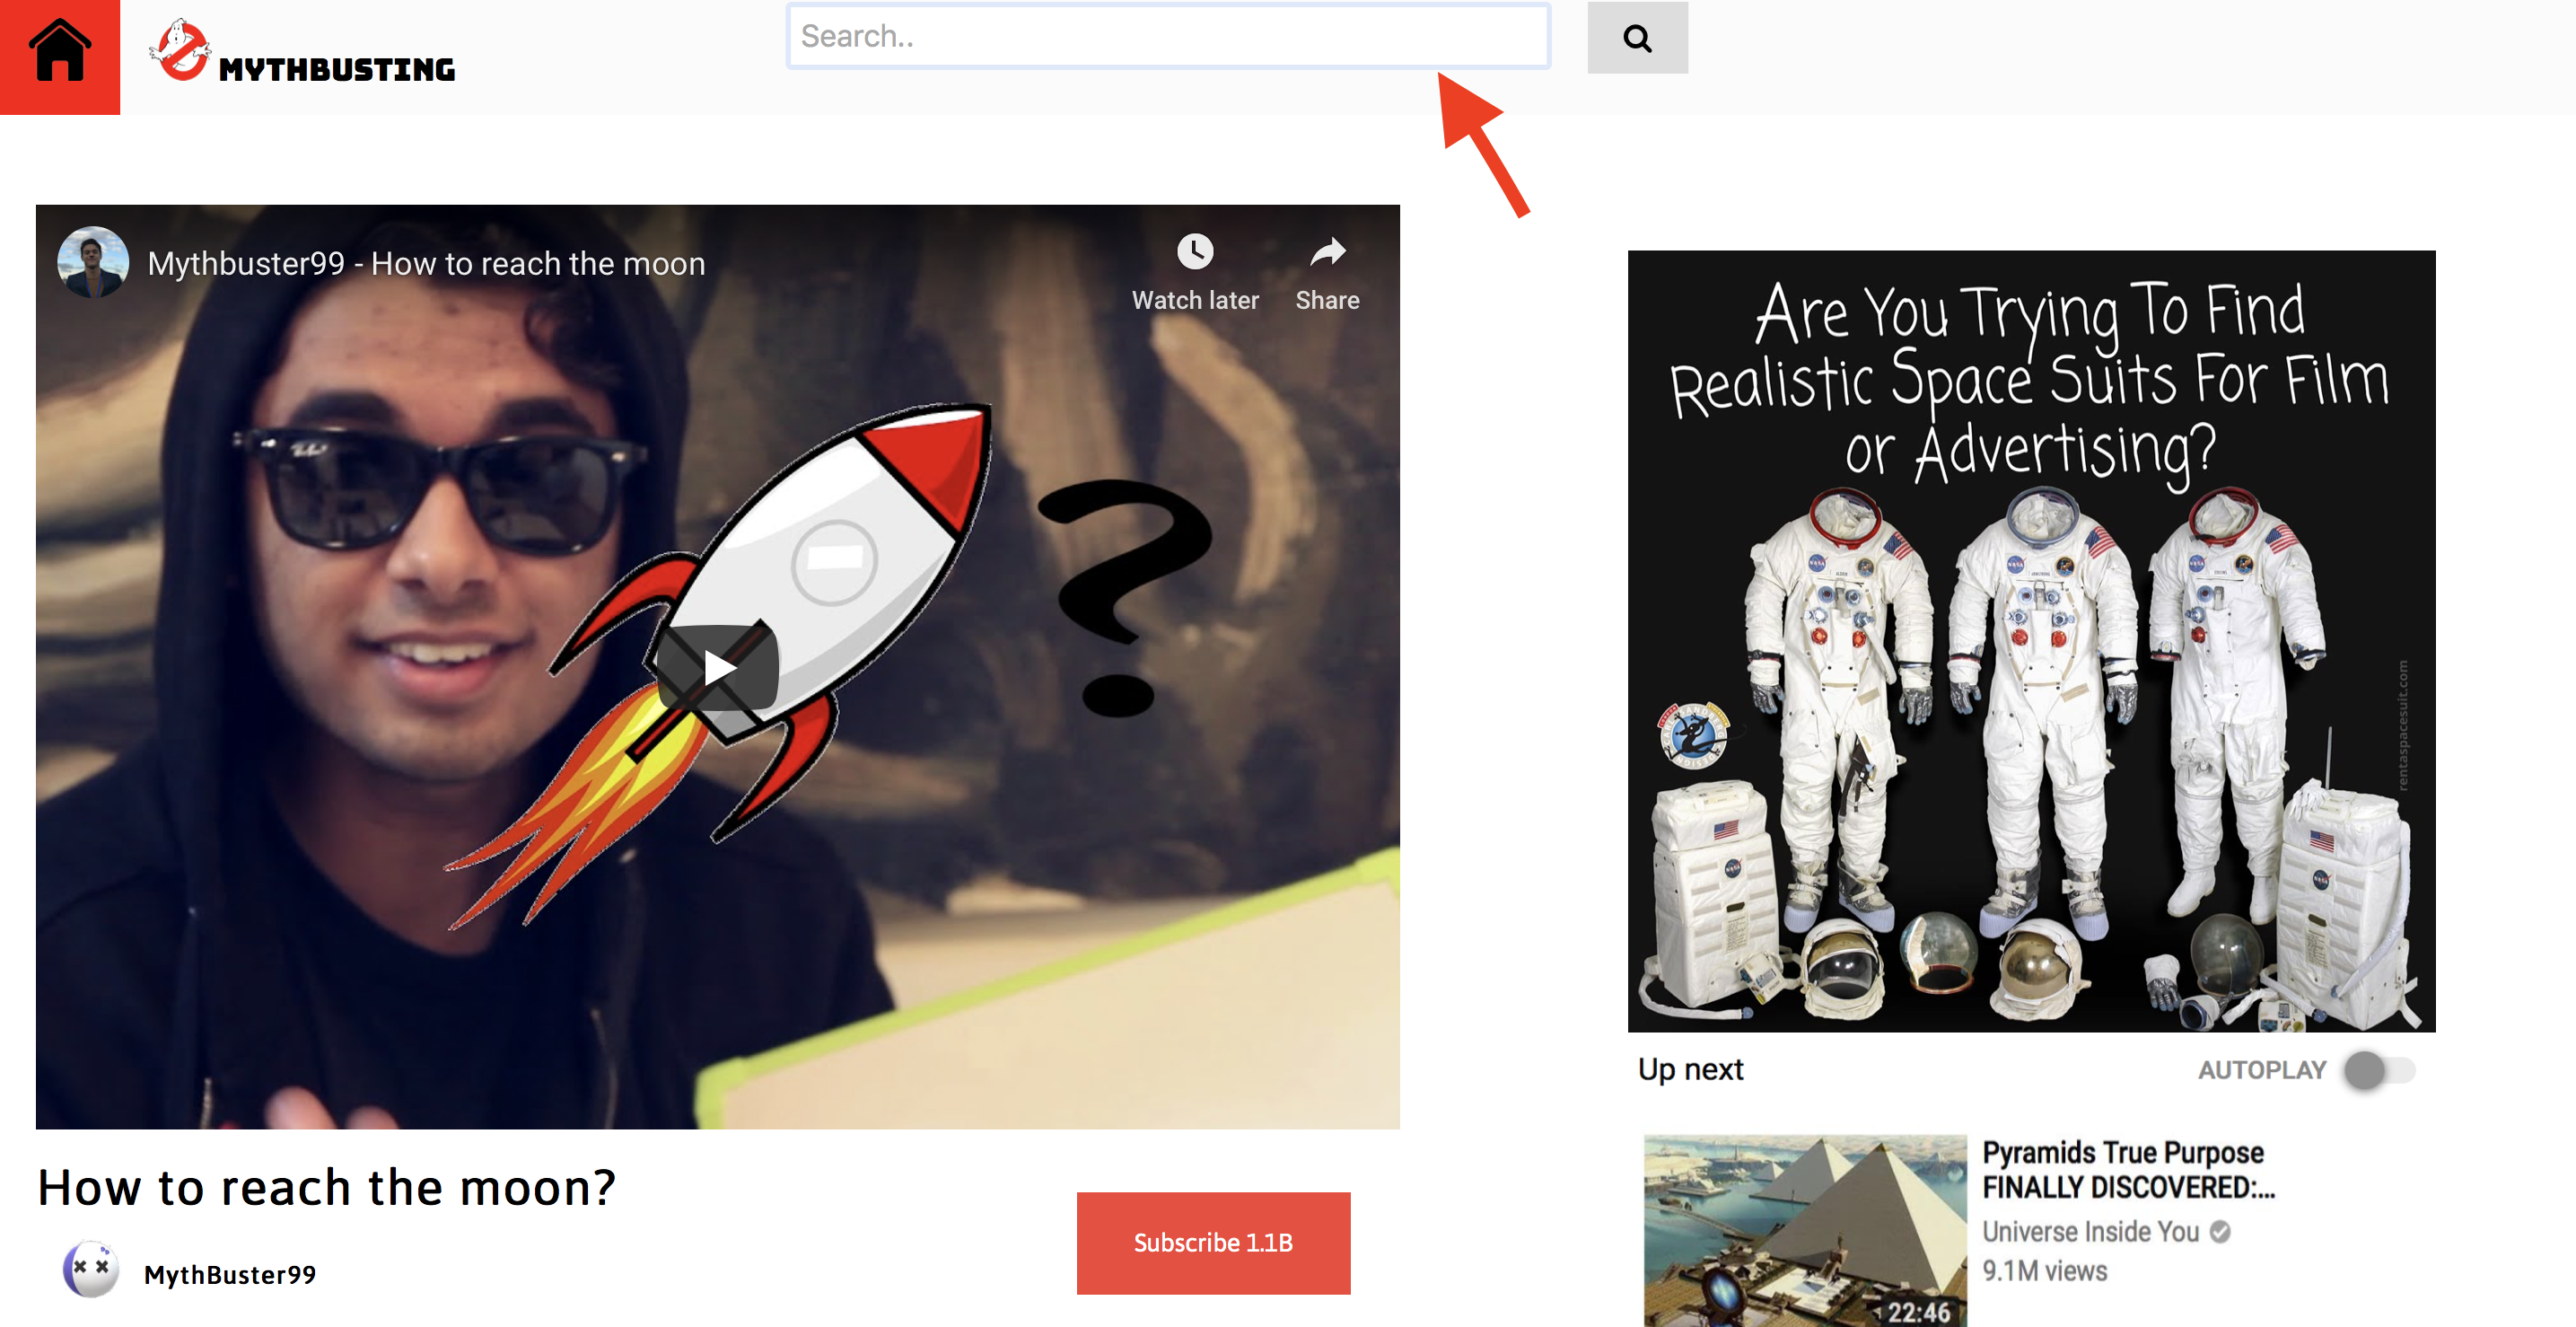
I started working on the website after we finished all the filming parts, using Youtube as an inspiration. I did not see the need to have several pages since even the about page could simply be written in the description below the video. and i did not want to use youtube's play button logo so instead i placed a mythbusters logo, and i also included a home button icon. I faced some trouble with positioning since i use safari and px for positioning instead of percentages, I had wahib help me with that so i couuld see how it would look on another computers screen. I also thought about how it would not be a youtube page if it did not include a subsribe button and a comments section, so wahib and i both worked on accomplishing that. i tried a comments addition where it would save the comments from previous users, but after positioning it in the correct location it stoped working? So i had to make the sacrifice of removing it. I also initially had a search button which i added mainly for the aesthetics and mimicing a youtube page, but i was faced with disagreements on it not being necessary and comprimised regarding that.
on how we decided on including a GoFundMe link in our website was how we did not manage to find a convincing astronaut costume in the end, but instead of letting this flaw hurt us Omar suggested that we turn it into a feature instead and make it comical with a link where users can fund this intellectual youtuber and i loved how we turned it around to benifit us in the end.
Reflection
i really enjoyed this project, especially since i said this idea out loud as a joke in the beginning but then we actually turned it into reality. And we all worked together in this group and it was enjoyable as well although we spent 3 hours filming one scene that literarly took up at most 2 minutes of our final video. but it was all worth it in the end, i am happy with the outcome of this project. and i learned how to work with video cameras and adjust them to fit the scene and location.